192.168.1.254 – Login Admin to Change Router Settings
The first step before logging in to your router admin area is to know its IP address. If you don’t know it, you will not be able to access its control page. In this case, we have the IP 192.168.1.254, which we will use to access the admin area and make the necessary configurations. These include changing the router Wi-Fi password and name, which is also known as SSID, setting an encryption mode, creating a guest network, and much more.
This guide is all about how to log in to 192.168.l.254, how to solve login errors and issues, and how to find the default login details.
What Is 192.168.1.254?
Routers that we use to access the internet come with default details that can be accessible to everyone. To change these details, we have to access their user area, which we can do by using the 192.168.1.254 IP address.
192.168.1.254 Admin Login
If you know the actual IP your router has assigned, then it’s a quick process to access the admin page. Here, as we know the IP, we would type it into the browser URL bar, not into the Google search engine. For quick access, you can also tap on the button below.
If you are facing issues after trying to access the admin login page, don’t worry. Just scroll down. I have explained the reasons and how to solve them.
Correct Steps to Access 192.168.1.254
Most users leave out one of the steps while trying to access their router configuration page. If you are also facing a login issue, it may be because you are not following the correct steps.
Look for the Correct IP Address
First, check whether your router has this IP assigned or not. You can do this by looking at the sticker printed on the back of the router because sometimes a user assumes that their router will have this IP, while in reality, it does not.
Must Be Connected to the Router Internet
If you are using a different router’s Wi-Fi or mobile data and trying to access the admin panel, you may see messages such as “You can’t access it” or “Slow internet connection.” That’s why you must be connected to the router’s Wi-Fi network for which you want to access the admin page.
Use the Browser Address Bar
When you know the correct IP, type it into the browser address bar, not into the search engine. If you do so, you will be presented with a different web page. For direct access to the login page, you must type the IP into the browser’s URL bar.
Enter Your Admin Password and Username
Most users get confused here and type the Wi-Fi password instead of the router admin password, but both are different. We use the Wi-Fi password to connect our devices to the internet, while the admin password is used to access the router configuration page. That’s why we use the admin password, not the Wi-Fi password.
Also, if ask, enter the admin username as well.
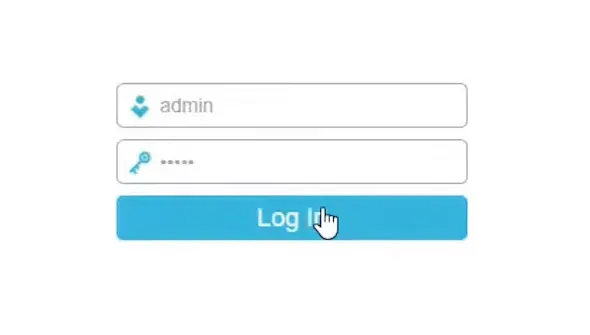
If you don’t know the admin password, you can find it on the sticker printed on the back or bottom of the router.
Default Login Details for 192.168.l.254
The standard default login details for this router IP are
|
Username |
Password |
|---|---|
|
Admin |
Admin |
If these do not work, you can check the default details on the router sticker.
Why I Can’t Log In to the Router Admin Page
There can be different reasons why you are not able to enter the router admin page or why it is showing errors. I am going to explain them all and how you can avoid these issues.
Using a Search Engine
A search engine displays different web pages, so you must use the browser’s address bar for direct access to the login page.
Typing the IP with the Protocol
If you are entering the IP with the HTTP or HTTPS protocol, I would suggest typing it without these first. If that doesn’t work, try http://192.168.1.254 and then https://192.168.1.254, as some newer models may not let you enter with HTTP, while some older models do not support HTTPS.
Typo in the IP
Most users type the IP incorrectly. They use L instead of 1, such as 192.168.l.254.
VPN, Antivirus, or Firewall
If any of these is active, it may also restrict you from accessing the panel. That’s why you should turn them off temporarily and try again.
Browser Cache
A browser sometimes caches or stores previous data, which can prevent a user from accessing the page. That’s why you should clear the cache first. To do this, click on the 3 dots at the top-right corner, then click on Delete browsing data, or press Ctrl + Shift + Delete on the keyboard and clear the browser cache.
Router Has a Different IP Address
It is not necessary that every router will use the same IP, so you must check the default IP first and then try logging in.
If you have bought a used router, the default IP may have been changed by the previous owner. Contact them to ask for the customized IP, or simply factory reset your router and then use the default IP. Sometimes ISPs also change the IP, so you may need to contact your ISP to confirm the correct address.
What to Do After Logging In to the Router Admin Panel?
Once you have access to the router interface via 192.168.1.254, you now have control over the router settings and can make the customizations you want. I would recommend making the following settings first, as they may improve your router’s security and performance.
Change the Default Admin Password
The default password on the sticker is visible to everyone, and they can access it without telling you and make changes to the router settings. For example, someone could create a guest network for themselves that only they can access, and you would have no knowledge of it. This may also result in slow internet.
Change the Wi-Fi Password
The same is the case with the Wi-Fi password. It is also available on the router sticker, and people can connect without asking you for a password. Changing it can help prevent unwanted users from accessing your network.
Change the Wi-Fi Name (SSID)
If people are asking you to connect their devices to your Wi-Fi and you don’t want them to, as it may result in slow internet performance, I would suggest changing its name and telling them, “I’m not using Wi-Fi anymore; I’m using mobile data.”
Set the Encryption Mode
Select WPA2/WPA3 if you have an older smart home router or legacy gadgets that don’t support WPA3. Newer devices can use the stronger WPA3 protection, while older devices can safely fall back to WPA2-PSK (AES).
WPA2-PSK (AES): Some routers do not support WPA3 at all. In this case, you can use WPA2-PSK with AES as your minimum fallback option.
TKIP: I would not recommend it because it is slower and less secure.
Set Up a Guest Network
It is a private network that you can modify as you want, such as setting limited hours so it only works at a specific time of the day, setting internet download and upload limits, blocking certain sites, setting up parental controls, and more.
You can also hide that network so others cannot see it and ask for access, or set it up for people who are asking for a network. You can connect them to the guest network so your main Wi-Fi has a lower load by limiting their watching, downloading, and uploading speeds.
FAQs
Conclusion
Logging in to 192.168.1.254 is a simple process if you know the correct router admin password. Once you access the router admin panel, you will have full control over the configuration, such as changing the Wi-Fi password and name, updating the admin password, selecting a secure encryption mode, creating a guest network, and making other necessary settings. If you face login issues, first check the IP address, make sure you are connected to the correct router network, and try the troubleshooting methods explained above.
One Comment